

Exporting leads from LinkedIn Sales Navigator doesn't have to be complicated. With Findymail's Chrome extension, you can export your leads—including verified emails and phone numbers—directly into Excel or CSV in just a few steps. No manual copying, no messy data formats, and CRM-ready files at your fingertips.
How to Export Sales Navigator Leads: Step By Step Guide
Ready to simplify your list-building? The instructions below walk you through the process of installing the Findymail Chrome extension, connecting your account, and exporting your leads from Sales Navigator.
Let's go!
How to Install the Findymail Chrome Extension
Before you can start exporting leads from Sales Navigator, you'll need to install the Findymail Chrome extension on your browser and connect your Findymail account.
Step 1: Create a Findymail Account
Start by creating a free Findymail account. We'll spot you ten credits to start, but if you know you're ready to start finding verified B2B contact information in bulk, consider starting your subscription.
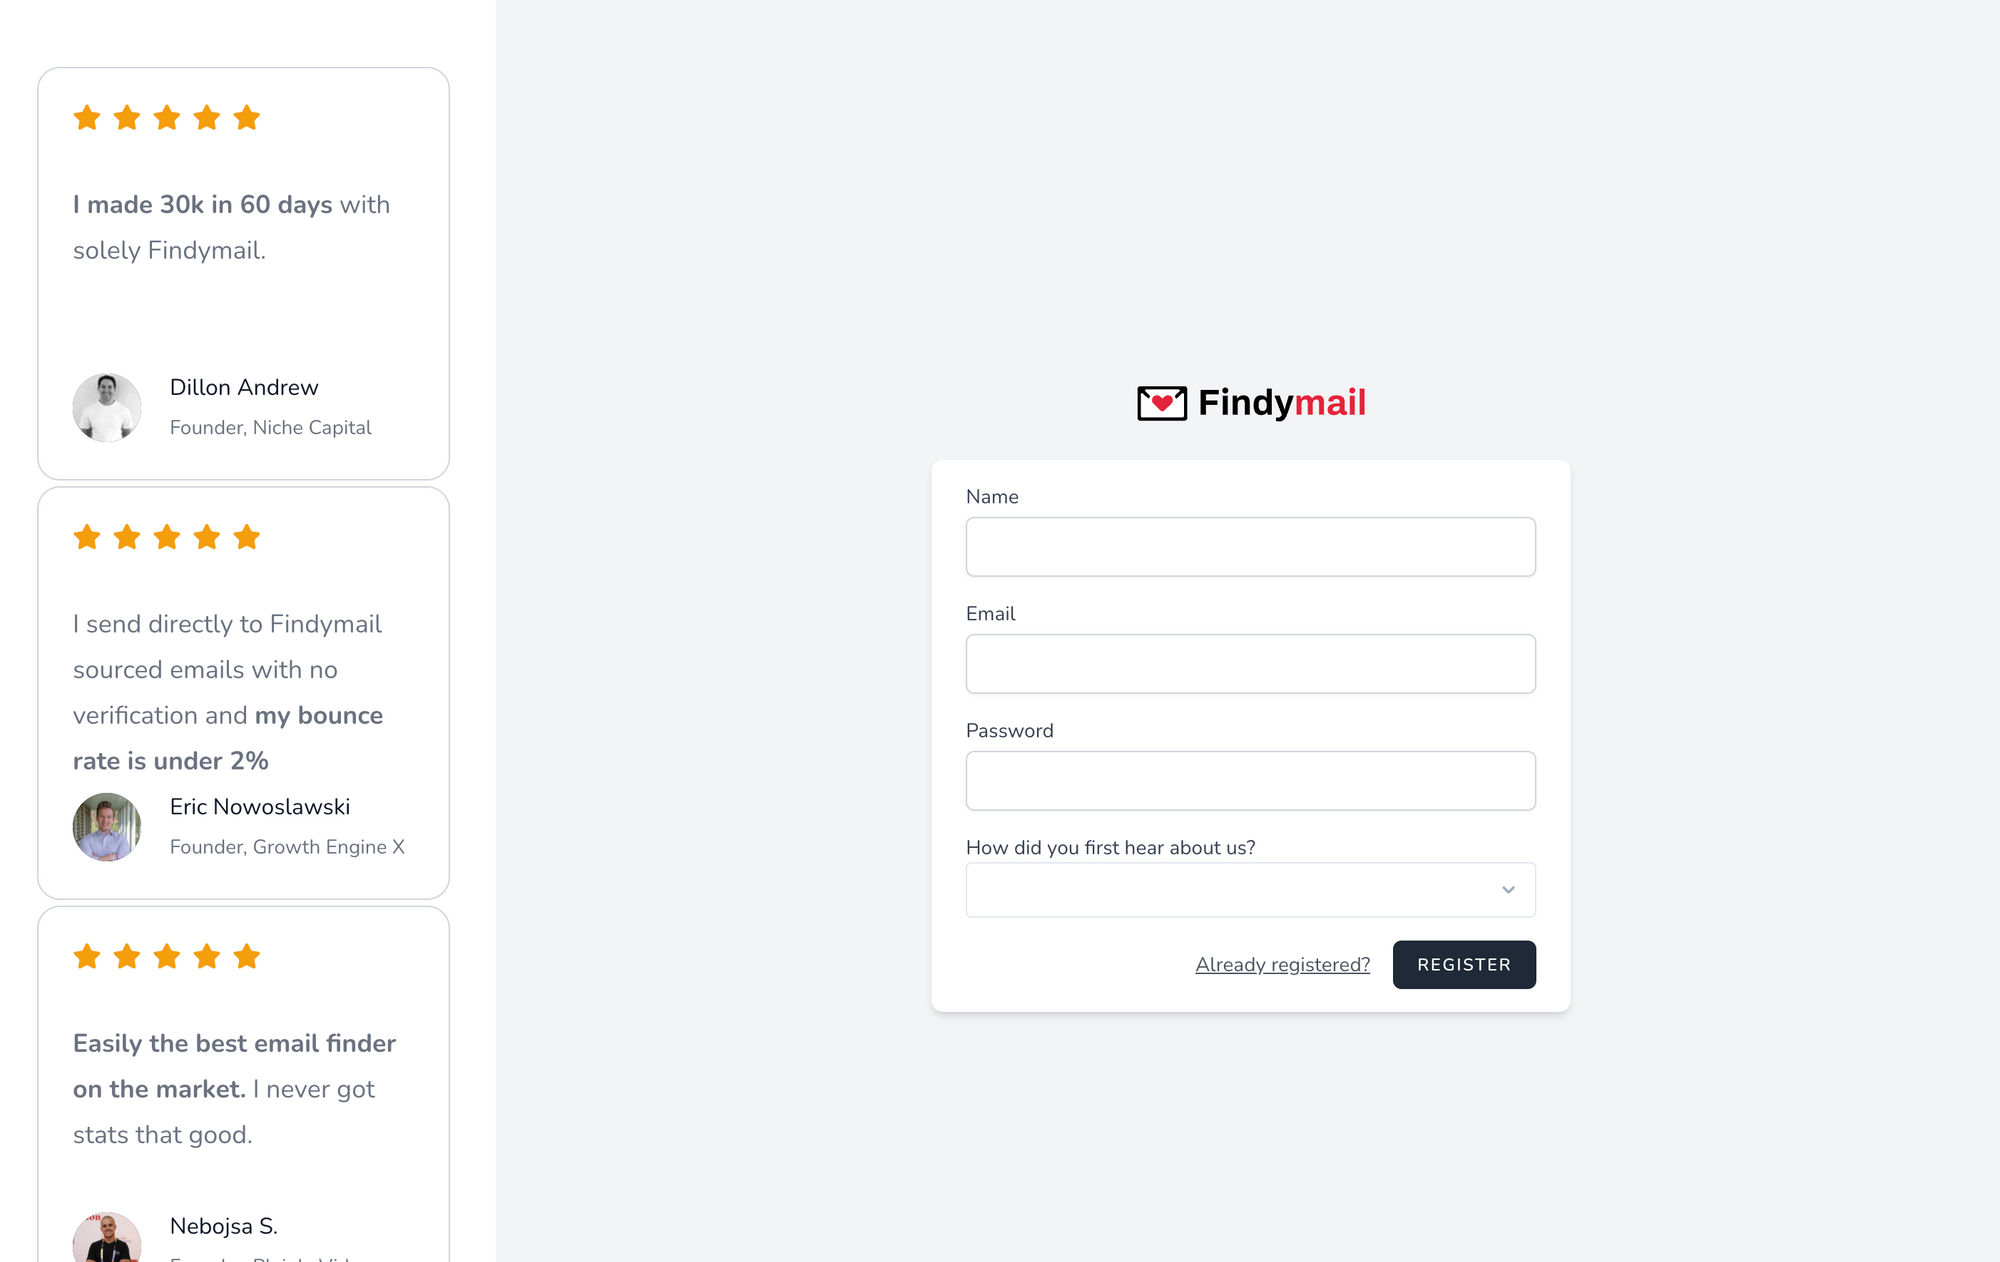
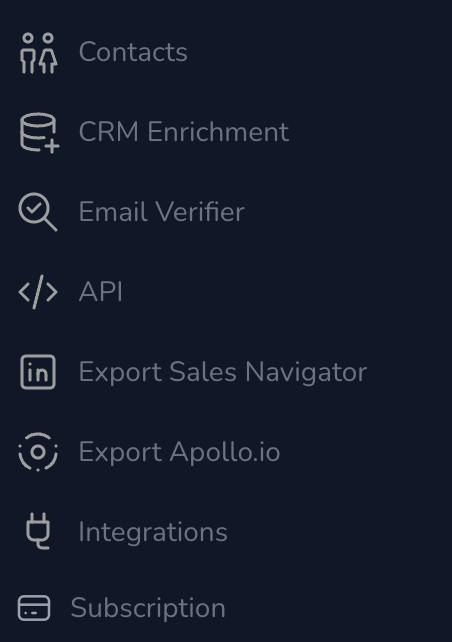
If you click on Export Sales Navigator in the sidebar, you'll find a step-by-step guide with a complete walk-through and some extra tips.
Step 2: Download the Findymail Chrome Extension
Next, download and install the Findymail Sales Navigator Chrome extension. This is where the magic happens, so make sure you're in the right place and installing the Findymail extension. You can either:
Follow this Chrome Web Store link, type Findymail in the search box, and click on Findymail in the list of results; or
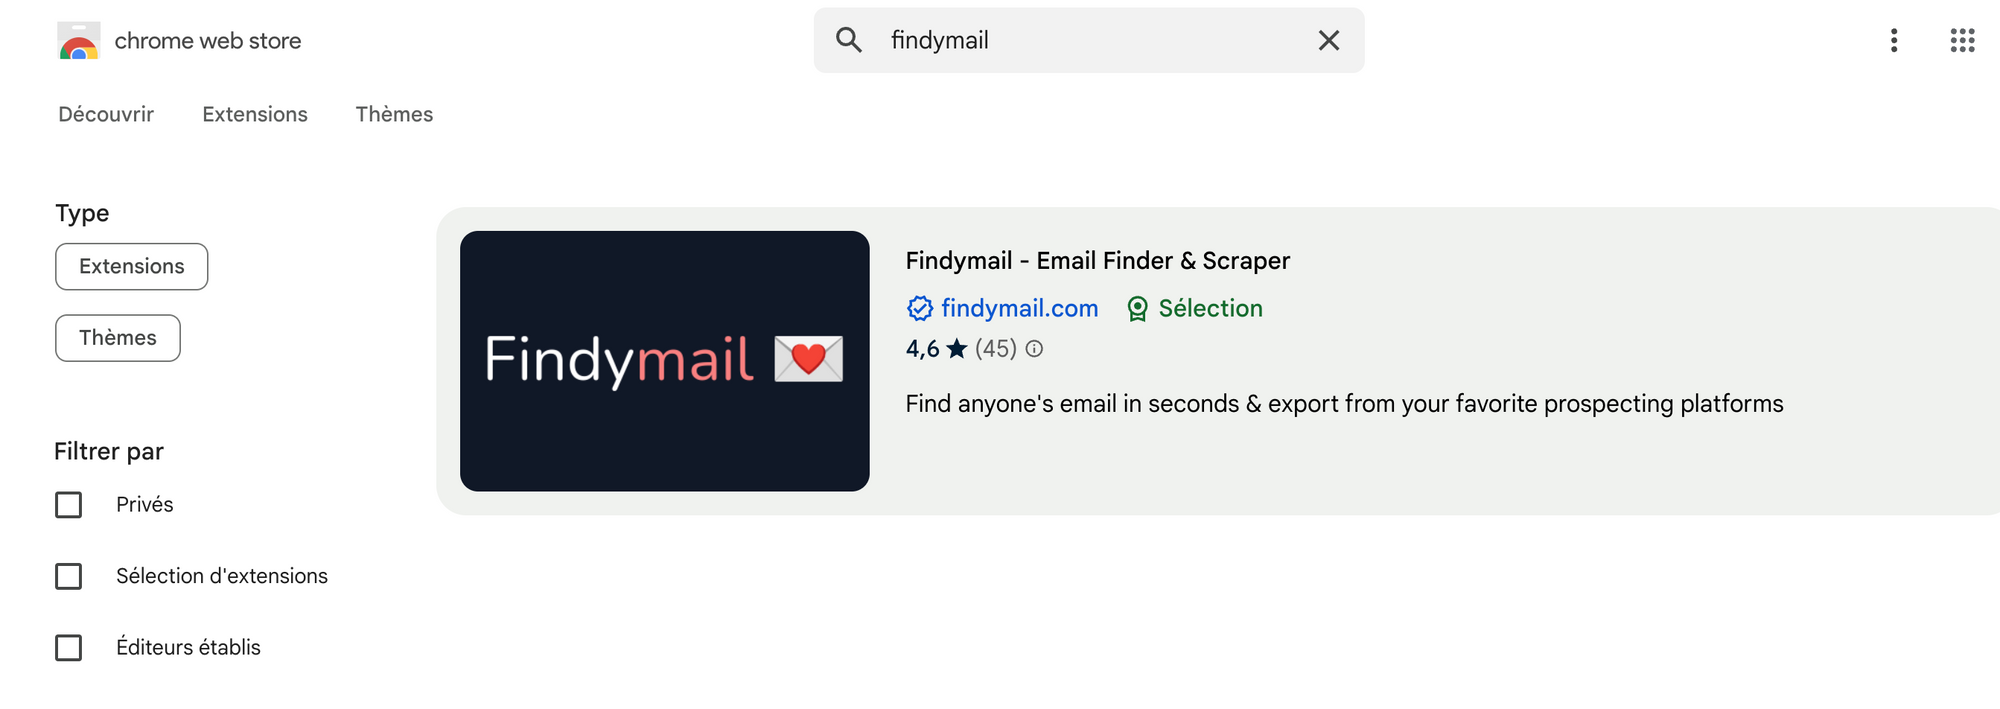
Click on this link which will take you directly to the Findymail extension’s page.
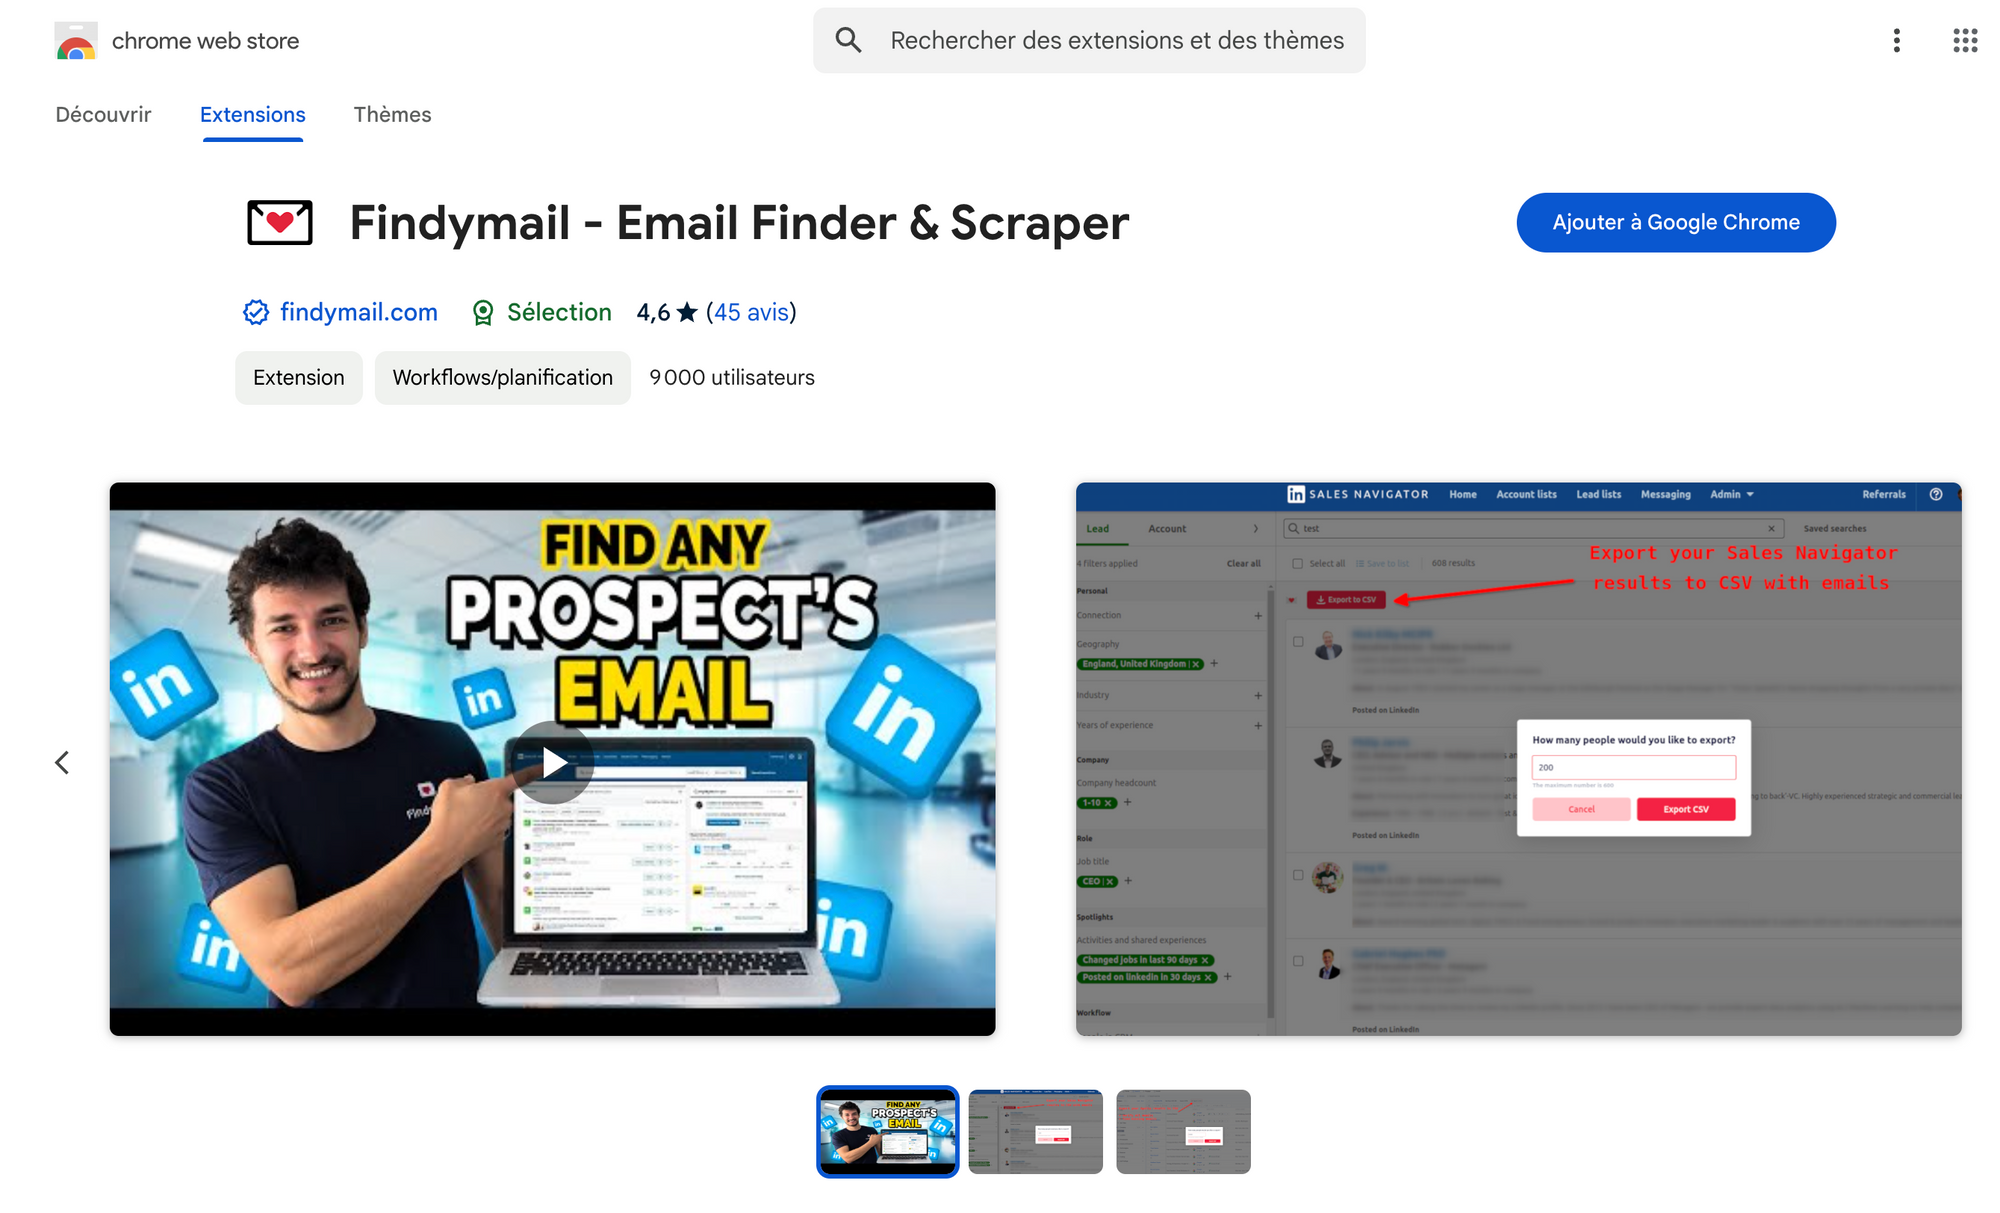
Either way, once the Web Store page opens, add the Findymail Chrome extension by clicking the Add to Chrome button in the upper right corner.
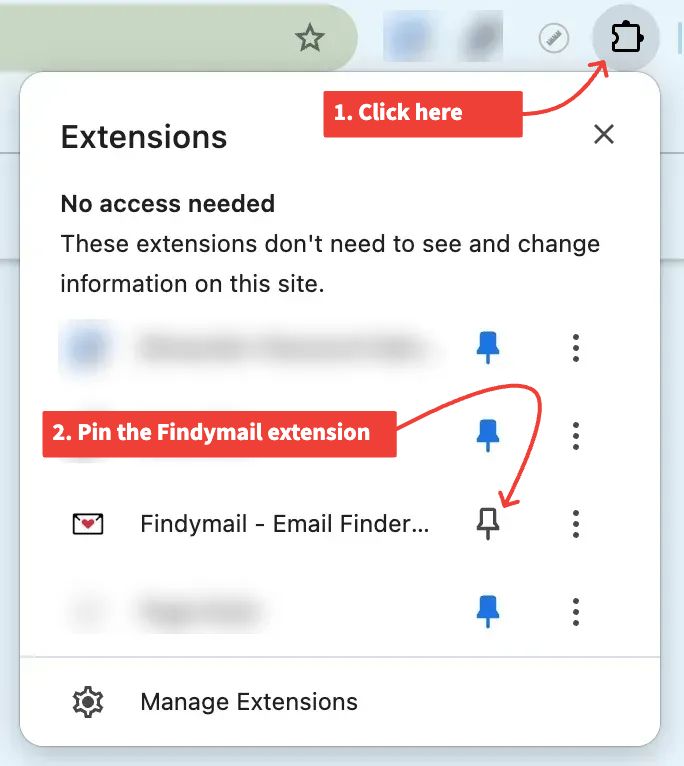
Once you’ve added the extension, it will appear in your taskbar. If it doesn’t, you can click the puzzle symbol and then on the pin to add it to the taskbar.
Step 3: Connect Your Findymail Account
When you’ve added the Findymail extension to your Chrome browser, the next step is to connect your Findymail account.
Click on the extension to log in. If you're already connected to the Findymail website on another tab, it should auto-connect. If not, it should redirect you to the login page.
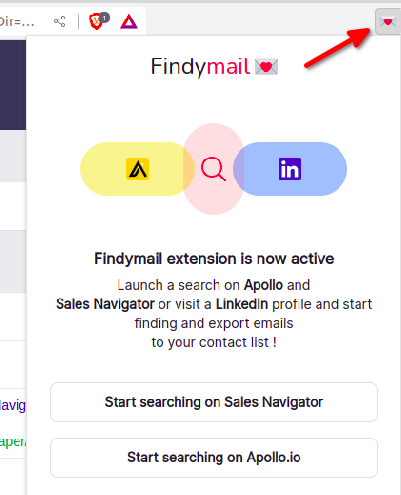
Once logged in, you should get the above screen: it means you're ready to export leads!
How to Export Sales Navigator Leads to a .CSV
Now that you've created a Findymail account and installed the Findymail Chrome extension, you’re ready to start exporting leads from LinkedIn Sales Navigator with verified contact data.
Start by heading over to Sales Navigator and searching for the leads you'd like. In this example, we’ll search for Chief Executive Officer. We’ll also filter the results to include only CEOs of companies in North America with less than 50 employees in the retail industry.
If you’re looking for highly targeted leads, Boolean search integration lets you refine your searches in Sales Navigator and export only the most relevant results. And when you need to go beyond email outreach, phone number extraction helps you pull verified phone numbers so you can easily add calls to your sales strategy.

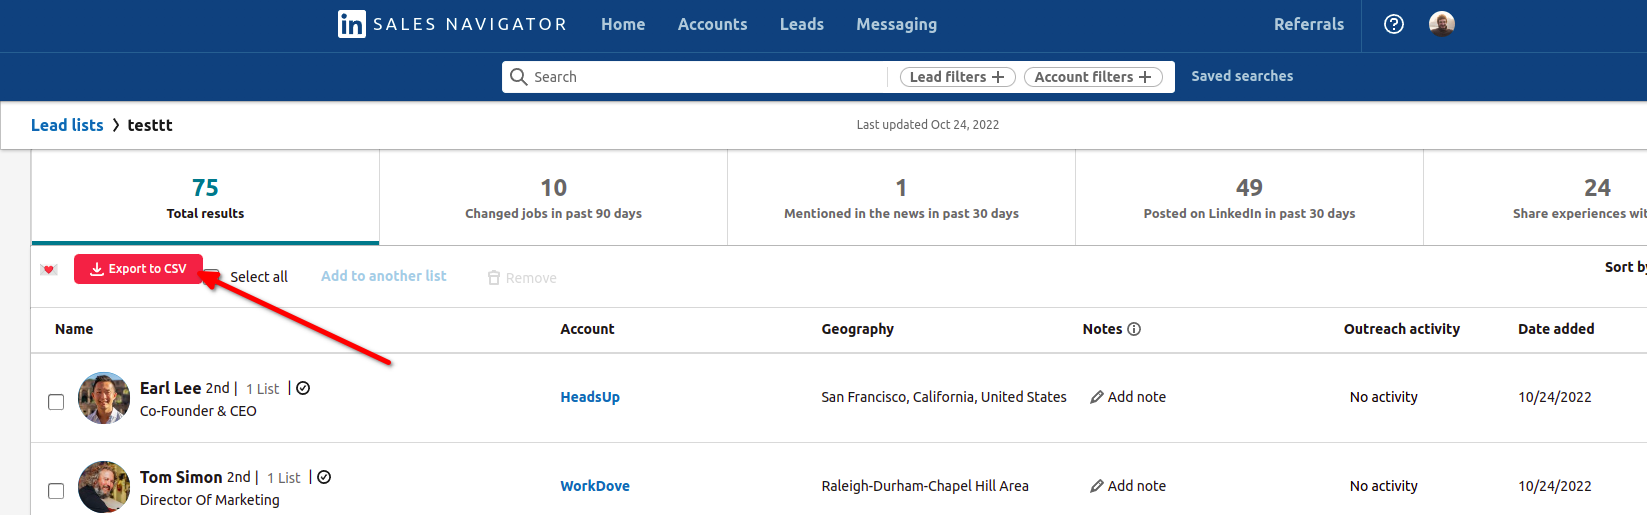
If we look at the results as they would usually appear, you’ll see a list of CEOs, from which you can then select the leads to save to your list. You can also check the Select All box to save all of them.
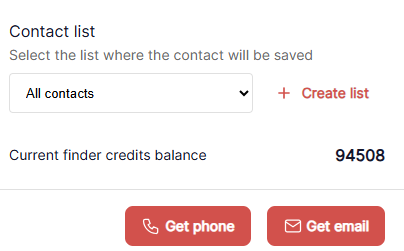
However, with Findymail activated, you’ll notice that there’s now an Export to CSV button. When you click on this button, a dialog box will open. Here, you can extract as many leads as you like up to 2,500.
You can also select the Findymail list to which you'd like to add those leads to keep things organized.
How to Export Saved Lead Lists from Sales Navigator
That same process also applies to your saved lead lists on Sales Navigator! Follow the above tutorial to install Findymail and the Export to CSV button will also appear in your saved lists.
You can export your saved lead lists from Sales Navigator to keep your CRM updated without having to run new searches every time.
How to Export Sales Navigator Accounts - Not Just Leads!
Findymail isn’t just for exporting leads. You can use it to build a Sales Navigator account list too. For companies focused on account-based marketing, account exports make it easy to pull detailed company data, track key accounts, and organize outreach efforts.
Once you’ve installed the extension, head over to the Account tab in your Sales Navigator search. You’ll see an Export to CSV button that lets you download company account data as a CSV file, which you can easily import into your CRM.
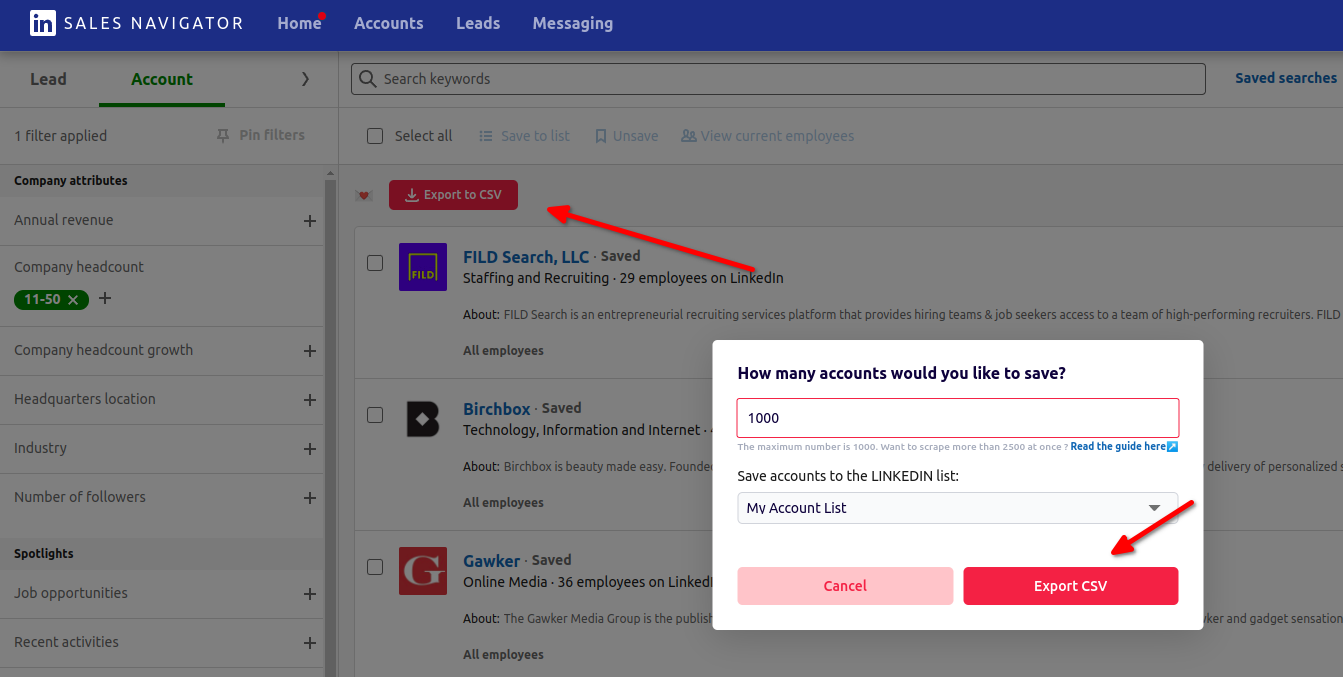
If you don’t need to export, you can still use the extension to build your account list quickly.
Instead of clicking Select All, Save to List, and Next Page over and over, just hit the Export button and choose your Sales Navigator account list. All your accounts will be saved directly to your list in seconds, ready for you to use in a lead search or anywhere else you need them.
And that’s it! No more copying and pasting leads or hunting down verified email addresses manually. With Findymail, you’ll have all the info you need to power your outreach in just a few minutes.
How to Import Sales Navigator Leads to Your CRM
So, you’ve exported your leads from LinkedIn Sales Navigator using Findymail. Nice work! Now it’s time to get that data into your CRM so you can actually start using it to close deals. Importing your leads isn’t just about organizing contacts; it’s the first step in refining your Ideal Customer Profile (ICP), integrating insights into your buyer personas, and setting the stage for effective multi-channel outreach.
The good news? It’s pretty simple. The steps might vary a little depending on which CRM you’re using, but here’s how to do it for Salesforce and HubSpot.
Importing Leads into Salesforce
If you’re using Salesforce, here’s what to do:
- Log into Salesforce: Head over to your account and open the dashboard.
- Go to Contacts: Click on “Contacts” to get to the section where you’ll be adding your new leads.
- Start the Import: Hit the “Import” button. This will open Salesforce’s data import wizard.
- Upload Your File: Choose the CSV file you exported from Findymail.
- Map Your Data: Salesforce will ask you to match the columns in your file (like name, email, company) with the correct fields in Salesforce. Just make sure everything lines up.
- Review and Import: Give everything one last look, then click “Start Import.” That’s it—your leads are on their way into Salesforce.
In a few minutes, your leads will be ready to go, all set for follow-ups, campaigns, or whatever you’ve got planned.
Importing Leads into HubSpot
For HubSpot users, the process is just as easy:
- Log into HubSpot: Go to your HubSpot account and click on “Contacts.”
- Start an Import: You’ll see an “Import” button at the top right. Click it, then choose “Start an Import.”
- Pick Your File: Since you’ve got a CSV file, select “File from computer.”
- Upload and Continue: Click “Next,” choose “One file,” and then “Next” again.
- Select Data Type: Choose “Contacts” because, well, that’s what you’re importing.
- Map the Fields: HubSpot will guide you through matching the columns in your file with the right fields in your CRM.
- Review and Finish: Double-check everything, confirm the import, and you’re done!
HubSpot will process your file, and your leads will show up shortly, ready to be worked.
Can You Export Leads from Sales Navigator Natively?
In short, no. LinkedIn won't let you export Sales Navigator leads natively because, well, the platform doesn't want you to do that. LinkedIn wants you to stick around and, ideally, rely on those expensive InMail messages to get in touch with prospects.
Fortunately, there's a workaround. Specialized tools called scrapers can help pull lead details from Sales Navigator into a structured format. Scrapers mimic human browsing behavior to collect names, job titles, company information and even email addresses. LinkedIn tries to discourage scraping by setting limits on how these tools can interact with the platform, but solutions like Findymail operate within the ethical and legal boundaries so you can export safely without risking your profile.
What Data Can You Export from Sales Navigator?
When you export data from Sales Navigator with Findymail, you’re not just getting names and job titles. You’ll have access to detailed lead data like verified emails, phone numbers, job titles, and the companies they’re connected to. On top of that, you can pull in-depth company data—things like industry, company size, revenue, and even details about the company’s tech stack.
You’ll also get useful info like time zone details and whether someone has a LinkedIn Premium account, which can come in handy when planning your outreach. It’s all the information you need in one place, without the hassle of tracking it down manually.
Findymail: Get More From LinkedIn Sales Navigator
Exporting leads from LinkedIn Sales Navigator doesn’t have to be a complicated, time-consuming process. With Findymail, you can quickly pull detailed lead and account data, including verified emails and phone numbers, and import it directly into your CRM.
Whether you’re managing saved lead lists, targeting specific accounts, or using advanced search filters, Findymail helps you keep your data organized and ready for action. It’s all about making your outreach more efficient, so you can spend less time on manual tasks and more time connecting with the right people.
FAQs
Can I Export More Than 2,500 Leads?
While LinkedIn caps searches at 2,500 leads, you can segment your searches to bypass this limit.
Is It Safe to Export Data from Sales Navigator?
Yes. Despite LinkedIn's official position on scraping, a number of reputable Sales Navigator scraper tools exist to help you find and move leads without the headache. Findymail ensures compliance with LinkedIn's technical guidelines, minimizing risks.
What Data Can I Export?
You can export verified emails, phone numbers, company details, job titles, and more.